 A ceramic coating will provide you with better protection than any sealant or wax while enhancing the gloss and keeping your car cleaner longer. … Sealants and waxes sit on top of the paint as a sacrificial layer that breaks down pretty quickly, is not chemical resistant and offers no additional strength to the paint.
Ceramic Coating Cost: $500 – $2,000
On the very low end as far as professional ceramic prices you can expect to pay at least $500 for just the application.
In many cases, ceramic coating your paint is absolutely worth the price. It provides great protection against contaminants and minor scratches, all while making the vehicle much easier to clean up. Coatings aren’t for every car or owner though. It really comes down to how you use and care for it.
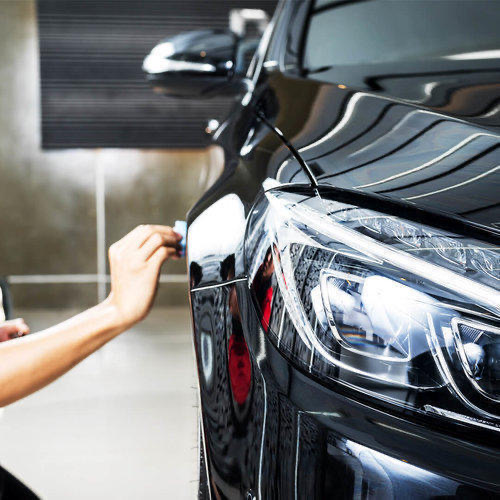
What is a Ceramic Coating? A Ceramic Coating (such as C. Quartz, and Ceramic Pro) is a liquid polymer that is applied by hand to the exterior of a vehicle. The coating chemically bonds with the vehicle’s factory paint, creating a layer of protection.
5 Tips for Maintaining Your Ceramic Coating
While a DIY Nano-ceramic coating is Superman-like strong when it cures, it does require some routine maintenance and care. In the information below, we’ll break down a few of the reasons why routine service will help extend the lifespan and improve the brilliance of your paint shine.
Here are five easy steps that you should follow to extend the lifespan of your ceramic coating.
Step #1 – Wash Your Car Every Two Weeks
Whether you have a daily driver or a garage-kept queen, it’s recommended to wash your car every other week. This will help to avoid the excessive build-up of contaminants. Even if you use a car cover on the vehicle, remember, car covers collect dust, which can penetrate underneath in microscopic levels.
Step #2 – Do Not Wash the Vehicle in Direct Sunlight
Direct sunlight creates heat – which is the sworn enemy of these professional coatings. To ensure you get the best results from your hard work of washing the vehicle, make sure you wash the car in shade, inside the garage, or outdoors (but not in direct sunlight). It’s always best to wash the car in the early morning or early evening hours – as the sun will be at its lowest levels. This will also help to avoid water spots — which is always nice.
Step #3 – Use the Two-Bucket Method of Washing
The two-bucket method of washing a car is proven to reduce swirl marks and produce the best wash results. For those who are not aware, basically, the two-bucket wash method is using one bucket for soaking your wash mitt – while the other is used to clean the wash mitt after each section you wash on the car. The ‘rinse’ bucket is filled with clean water, has grit guards and used to simply rinse dirt, and debris from the wash mitt after each, individual application.
Step #4 – Use an Automotive Specific Car Soap or Shampoo
There are some coating companies who swear by using a specific type of soap for washing (which ironically, they sell as secondary maintenance products). Here is the truth – these soaps are automotive-specific products that do not contain harsh abrasives, chemical agents or other contaminants. It’s always best to use a quality car wash soap or shampoo. You don’t need to use any products with added wax or polish – just straight, good suds producing car shampoo. When you wash (with the two-bucket method) always wash from top to bottom and rinse each section as you finish (like that two-bucket video showed you).
Step #5 – Always Use Separate Wash Buckets and Mitts for Wheels
Tires and wheels collect brake dust, which is basically microscopic pieces of metal shavings. Just think logically here for a second. Why on earth would anyone want to use a wash mitt with tiny pieces of metal to wash their ceramic coated paint on their ride? So – does it make sense to use separate materials for washing wheels?